When you purchase through links on our site, we may earn an affiliate commission at no cost to you.
Let’s face it, not everyone has a sprawling basement or backyard to grow cannabis. For many of us, life is about making the most out of limited space—whether it’s a tiny apartment, a closet, or even a spare cabinet. Enter micro-growing: the art of growing cannabis in small spaces while still pulling off surprisingly impressive yields.
This guide will teach you everything you need to know to start your micro-grow journey, maximize your harvest, and maybe even impress your friends with how much dank bud you can grow in the tiniest of spaces!
What is Micro-Growing?

Micro-growing is a cultivation method designed for people who don’t have a lot of space to work with. It involves growing cannabis in tight quarters like closets, grow tents, or even repurposed furniture. Think of it as a bonsai approach to cannabis cultivation—keeping plants small and manageable while optimizing every inch of space for production.
The goal? Small space, big rewards.
Why Micro-Grow?
Here are a few reasons to dive into the micro-growing world:
- Discretion: Perfect for stealth growers or urban environments.
- Cost-Effective: You need less equipment, soil, and nutrients than with large grows.
- Control: It’s easier to manage fewer plants, especially for beginners.
- Creativity: Repurpose old cabinets, bookshelves, or PC cases into grow setups!
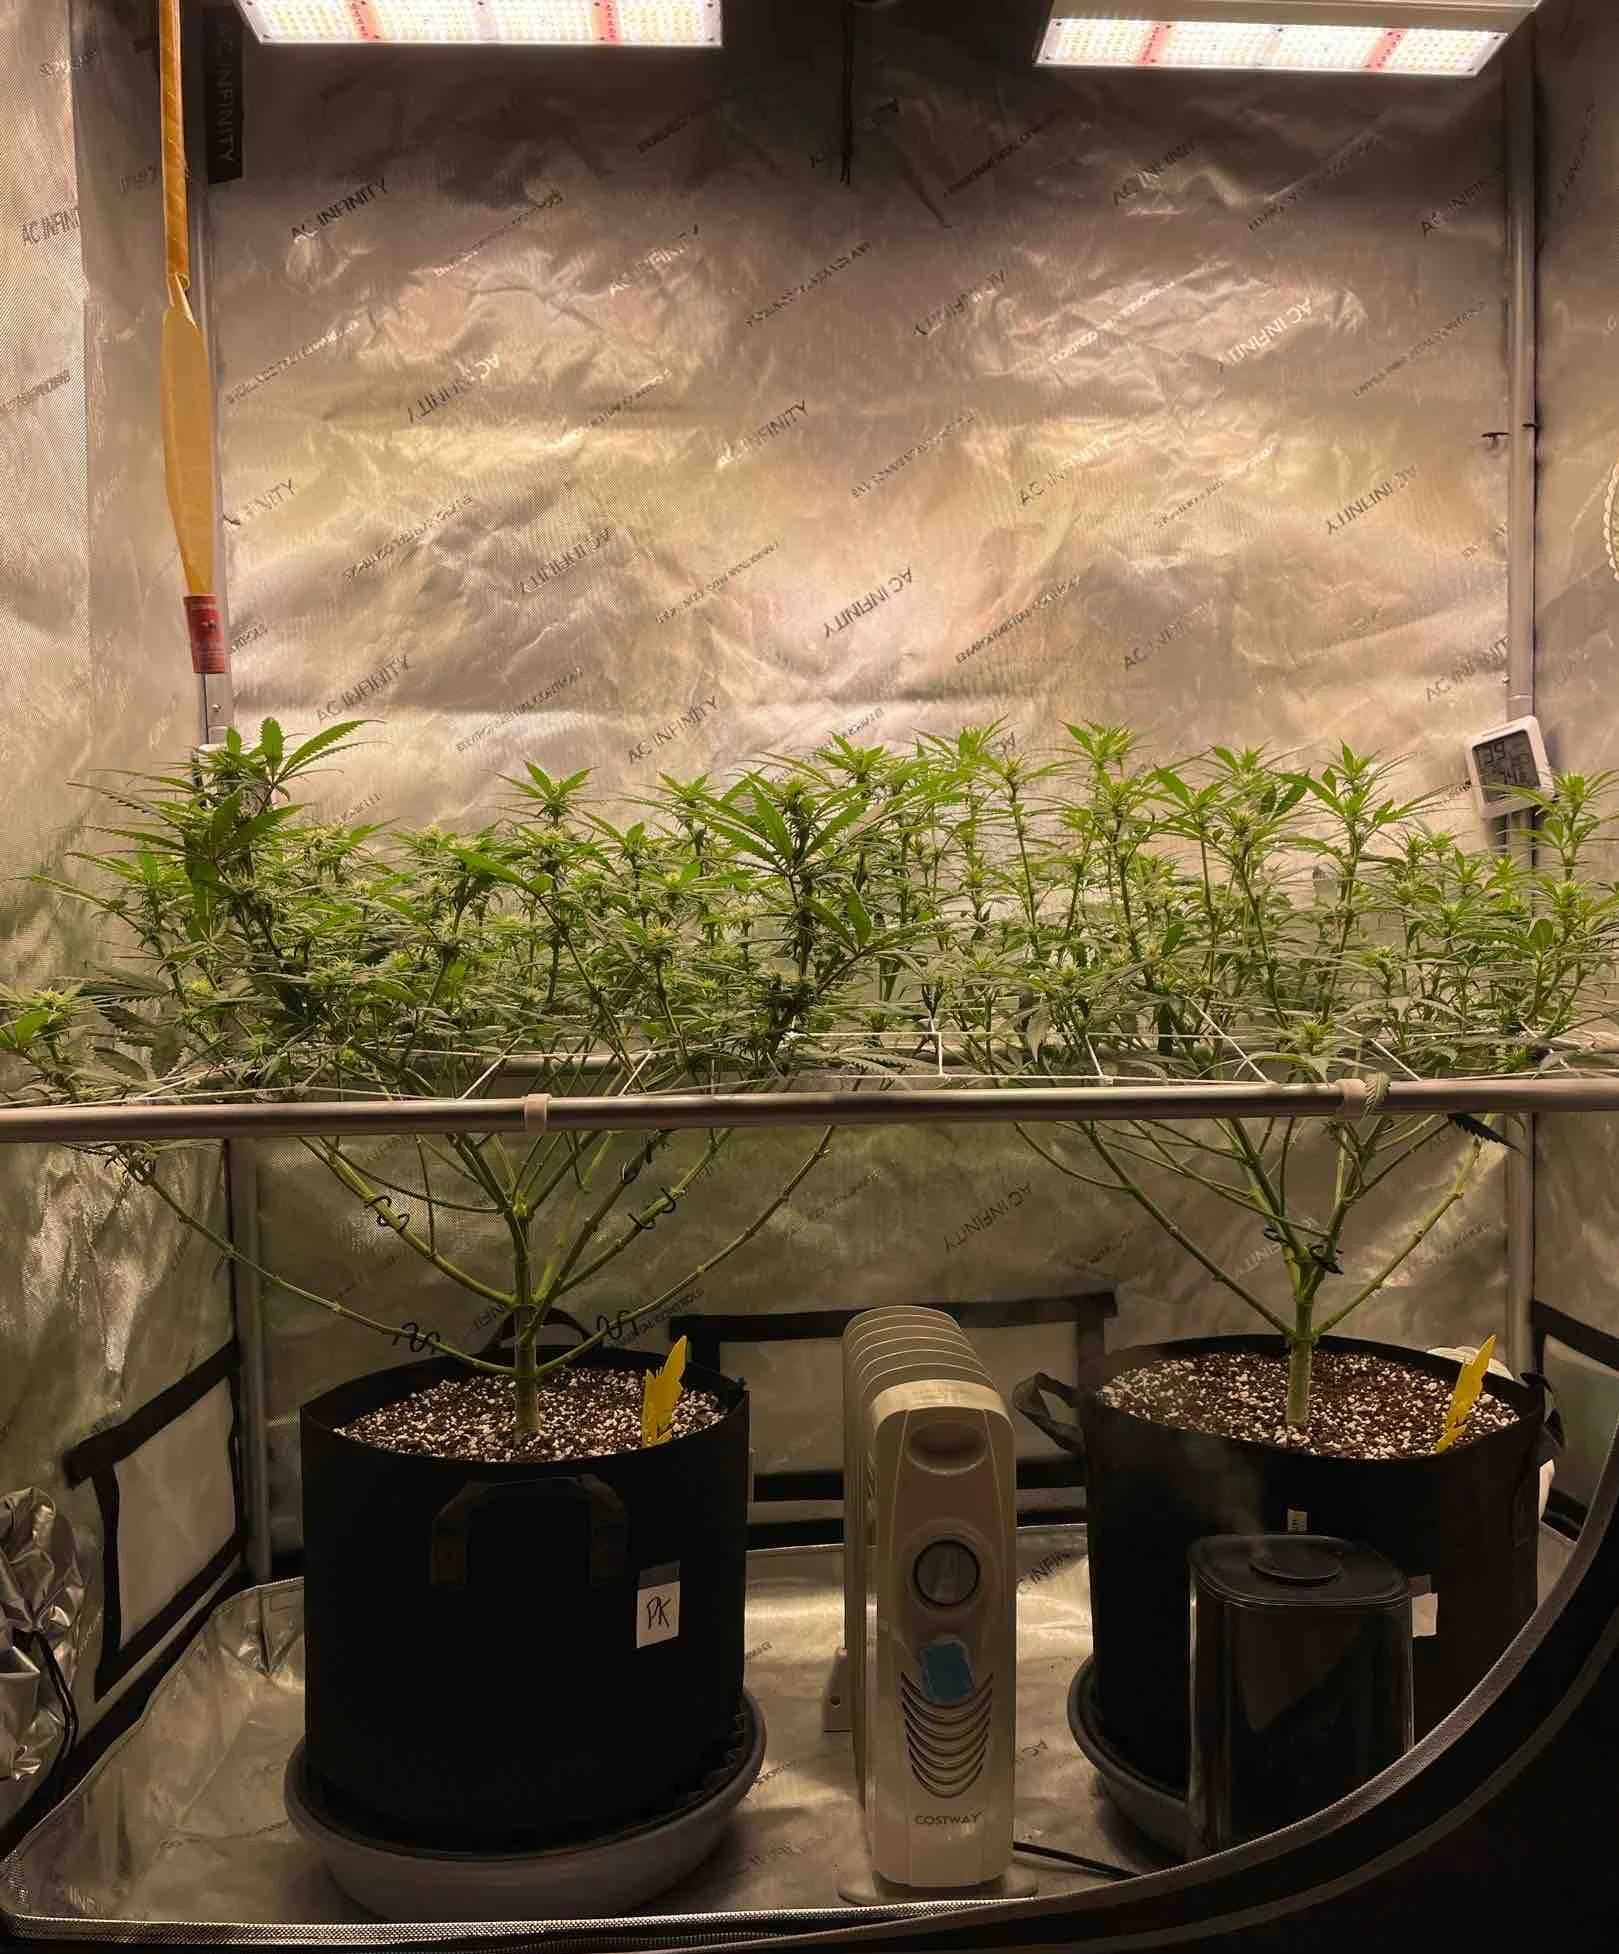
Setting Up Your Micro-Grow

1. Choosing Your Space
Your grow space can be anything, as long as it’s small, enclosed, and easy to control. Here are some options:
- Closets: A classic choice for micro-grows. Line it with reflective material, and you’re good to go.
- Grow Tents: Small tents like the VIVOSUN 24”x24”x48” are perfect.
- DIY Options: Repurpose an old dresser, cabinet, or even a plastic storage bin.
Pro Tip: Make sure the space is lightproof—leaks can mess up your plant’s light cycle.
2. Lighting
In micro-growing, the right lighting is key. Big, hot grow lights won’t work in tiny spaces, so go for:
- LED Grow Lights: Look for small, low-wattage LEDs like the Mars Hydro TS600 or Spider Farmer SF1000.
- CFL Bulbs: Cheap and easy, but not as efficient as LEDs.
3. Ventilation
Good airflow prevents mold and keeps your plants happy. In small spaces, a small exhaust fan (like a PC fan) and an intake hole work wonders. Don’t forget a carbon filter to keep the smell under control!
4. Containers
Choose small pots (1-3 gallons) to limit root growth and control the plant’s size. Fabric pots are a great option—they encourage root pruning and improve airflow.
5. Soil and Nutrients
Go for a high-quality soil mix like FoxFarm Ocean Forest or Coco Loco and pair it with simple nutrients like the General Hydroponics Flora Series. Stick to the basics—less is more in a micro-grow!
Strains for Micro-Growing
Not all cannabis strains are created equal, especially when it comes to small spaces. You’ll want to focus on:
- Autoflowers: These plants stay compact and flower automatically, like Northern Lights Auto or White Widow Auto.
- Indicas: Generally shorter and bushier than sativas. Try Blueberry or Bubba Kush.
- Strains Specifically for Small Spaces: Look for strains labeled as “compact” or “micro-grow friendly.”
Pro Tip: Keep an eye on the breeder’s height specifications when buying seeds.
Training Techniques for Micro-Growing
In micro-growing, space is at a premium, so training your plants is essential. Here’s how to keep your plants small, manageable, and productive:
Topping
Cutting the top off the main stem encourages the plant to grow bushier instead of taller.
Low-Stress Training (LST)
Gently bend and tie down branches to spread them out horizontally. This allows light to reach all parts of the plant.
Sea of Green (SOG)
Grow multiple small plants in a tight space. Focus on developing one main cola per plant for a faster harvest.
Defoliation
Remove unnecessary fan leaves to improve airflow and light penetration. Read more about defoliation here.
Example Setup: $300 Micro-Grow Closet
Here’s an example of a low-budget micro-grow setup:
- Grow Space: Repurposed cabinet (free or $50 second-hand)
- Lighting: Mars Hydro TS 600 ($79)
- Ventilation: USB-powered PC fans + ducting ($25)
- Containers: 2-gallon fabric pots ($15)
- Soil & Nutrients: FoxFarm Ocean Forest + General Hydroponics ($40)
- Seeds: Autoflowering strains ($50 for 5 seeds)
Total: ~$300
This setup can yield 1-2 ounces per plant in just 12 weeks.
Common Challenges and How to Fix Them
Heat Buildup
Small spaces heat up fast. Use LED lights, and install a small fan to keep things cool. Proper ventilation can also reduce heat.
Overwatering
Small pots dry out quickly, but overwatering is a common rookie mistake. Water only when the soil feels dry 1-2 inches down. If you’re in doubt, weigh the pot right before you water, completely saturate the pot, then weigh it again. Once it drops back down to the dry weight, you know it’s time to water again.
Light Leaks
Your grow space must be completely dark during the plant’s night cycle. Seal any gaps with duct tape or weatherstripping. Be aware of any light emitting from devices inside your tent/closet. Even the slightest bit of light has the potential to cause big problems like hermaphrodites.
Odor Control
Cannabis plants smell—especially during the flowering phase. Use a small carbon filter and exhaust fan to keep things discreet.
Advanced Tips for Taking Your Micro-Grow to the Next Level

Once you’ve got the basics of micro-growing down, there’s always room to level up. Whether it’s increasing yield, boosting potency, or making your setup even stealthier, these advanced tips will help you maximize your grow.
Maximizing Light Efficiency
In micro-growing, every photon counts. Here’s how to make the most of your lighting setup:
- Reflective Surfaces: Line your grow space with Mylar, reflective tape, or even flat white paint to bounce light back onto your plants.
- Light Distance: Keep your LED or CFL lights at the optimal distance (usually 12-18 inches for LEDs) to avoid burning the plants while maximizing coverage.
- Light Schedule: Stick to an 18/6 schedule during vegetative growth and 12/12 for flowering. For autoflowers, many growers recommend 20/4 for the entire grow cycle.
CO2 Enrichment
Adding carbon dioxide can enhance plant growth and yield, even in small spaces. While CO2 tanks may be overkill for a micro-grow, you can use DIY methods like sugar-yeast fermentation to produce a small, steady supply of CO2.
Dialing in Temperature and Humidity
Small spaces can experience rapid fluctuations in temperature and humidity, which can stress your plants. Here’s how to keep things stable:
- Use a mini hygrometer to monitor the environment.
- During vegetative growth, aim for 70-85°F and 50-70% humidity.
- For flowering, lower humidity to 40-60% to prevent mold.
- If things get too humid, silica gel packs or a small dehumidifier can work wonders.
Stealth Growing: Keeping Your Micro-Grow Low-Key
One of the biggest perks of micro-growing is its ability to fly under the radar. Here are some extra tips to keep your operation discreet:
Soundproofing Your Setup
Grow equipment like fans can generate noise, which might raise eyebrows. Reduce sound with rubber fan mounts, foam insulation, or by placing your grow setup on a vibration-absorbing mat.
Odor Control on a Budget
Carbon filters are the gold standard for keeping your grow scent-free, but if you’re on a tight budget, here are a few hacks:
- Use ONA Gel (Odor Neutralizing Agent) near the grow space.
- DIY a carbon scrubber by filling a mesh pencil cup with activated charcoal and attaching it to your fan.
- Ventilate your grow space into a larger, well-ventilated room to dilute odors.
Creative Stealth Spaces
Here’s where things get fun—micro-growing lets you think outside the box. These clever stealth setups have been used by crafty growers:
- PC Grow Box: Convert an old computer tower into a mini grow space.
- Bookshelf Grow: Hollow out a section of an old bookshelf for an ultra-discreet grow.
- Grow Tent in a Closet: Combine the stealth of a closet with the efficiency of a small grow tent.
Pro Tip: If you live with others, avoid opening your grow space when they’re around—nothing blows your cover faster than the smell of fresh weed.
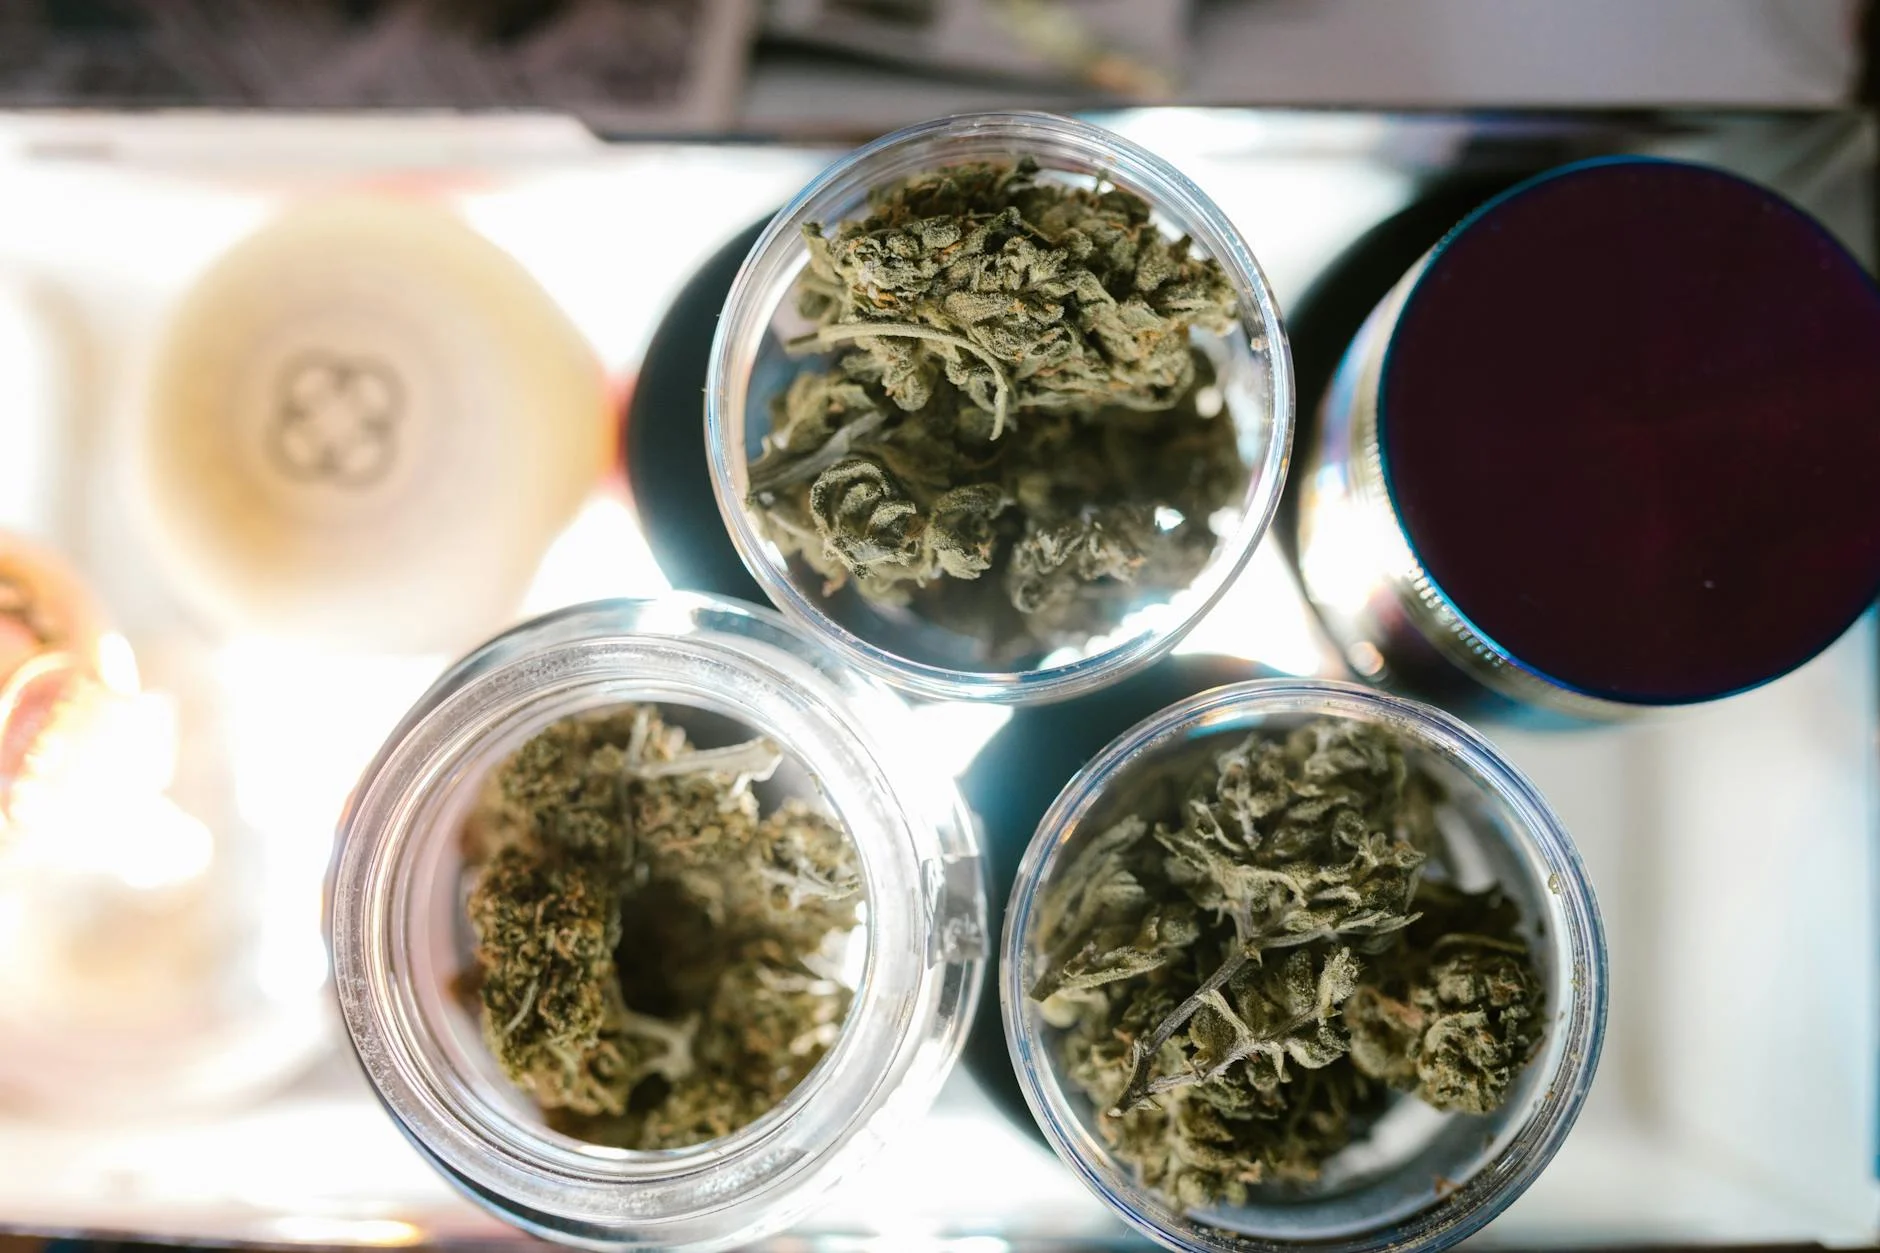
Harvesting Your Micro-Grow

Micro-growing doesn’t mean micro-buds. With proper care, you can still achieve dense, frosty nugs. Here’s how to finish strong:
- Harvest when the trichomes are cloudy or amber, depending on your preference.
- Dry in the same small space by hanging the buds on string or clothes hangers.
- Cure in mason jars or grove bags for at least 2 weeks to enhance flavor and potency.
High Times in Small Spaces
Micro-growing is all about working smarter, not harder. By maximizing your limited space and using clever techniques, you can produce high-quality cannabis without needing a massive setup. Whether you’re a newbie grower or an experienced cultivator looking for a stealthier approach, micro-growing has something to offer.
So, roll up your sleeves (and maybe a joint), and start your micro-grow journey today. Your tiny, potent harvest is just a few weeks away.
Join us on The HighWay.


Leave a Reply
You must be logged in to post a comment.